Your first form
Create a form, share its link and receive your first inquiry.
On this page
All guides
Choose how to use your form
- Open Forms and choose Create a form. New accounts see these choices directly on their dashboard.
- Choose a contact page for your bio or messages, a ready-made website form, or a connection to your own form. This guide follows a contact page.

The same screen also starts a quick poll, feedback, a list of choices or a blank survey; see polls and feedback.
Questions and appearance
- In Questions, set a Public title for visitors, such as “Contact Studio Fern”. Setup suggests this when your business name is saved.
- If you like, change the Internal name, for example to “Instagram”. Only you see it, in your dashboard and notification emails.
- Edit the ready-made questions. Choose Continue when this step is ready.
- In Appearance, use the live preview to see your form.

Your unfinished progress is saved privately as you type. Wait for “Draft saved” before closing the browser; the Forms link at the top saves your draft before you leave.
Free uses the makeform.live appearance. Pro adds your logo, business colours and removal of the promotional badge; these options are clearly marked.
What Pro adds to the appearance
Pro removes promotion even when custom branding is off. It also offers visual templates, separate heading and body fonts, and heading, text, page and form colours, with a contrast check. The logo replaces the title initial. After sending sets the screen visitors see right after sending, previewed in the same style as the form.
What you can publish
Publish questions, images and links you are entitled to use. Pornographic imagery, targeted harassment or threats, phishing, scams and harmful downloads are prohibited. A button shows its destination and opens only when chosen; HTTPS alone does not make it trustworthy. Visitors can use Report abuse on a form, its thank-you screen or shared results. Reports are reviewed manually. A staff restriction preserves saved data but stops public access, new submissions and queued visitor receipts. Editing or resuming cannot remove it. Contact support with the form reference to appeal.
Privacy, notification email, then review
- In Privacy, choose how long to keep inquiries.
- Add your existing notice link, or create a hosted notice using your public business details.
- Preview the full notice and confirm you have reviewed it.

The hosted notice is included on Free and becomes public with your form. Get help with this step.
- In Notifications, if you own the account, your sign-in address is already verified; other addresses need their own six-digit code.
- Check the summary in Review and publish, then choose Publish form. You can resume a saved draft from Forms.
Emails include a link to each inquiry; you can include inquiry details later in the form’s Settings → Notifications.
Share it and try a message
- Open the form’s Share tab and choose Copy link. On a phone, Share opens your apps.
- Use the public form link in your bio, messages or emails. Your customers do not need a makeform.live account.

Share shows the option you chose: a contact link, a ready-made website form or your own form. To add a website connection, open Share and use Change how you share. Existing links keep working.
- Under Try your form, choose Open your form and send a short test message.
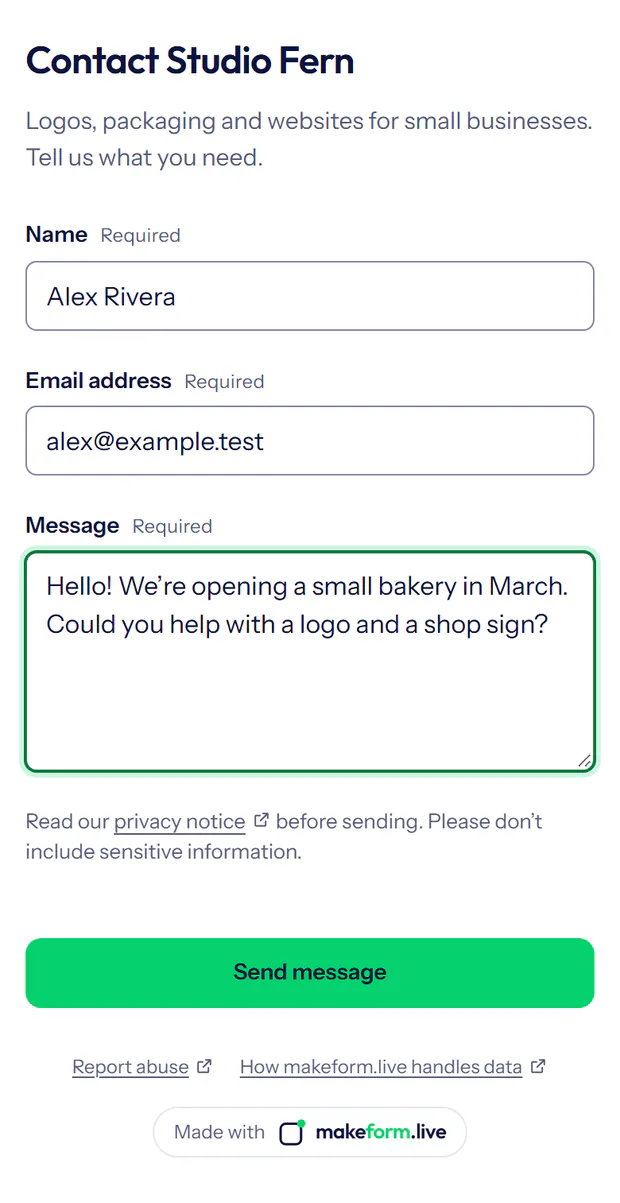
- Return to Inquiries and choose the refresh button.
- Open the message, reply using your email app and mark it as handled when you are done.
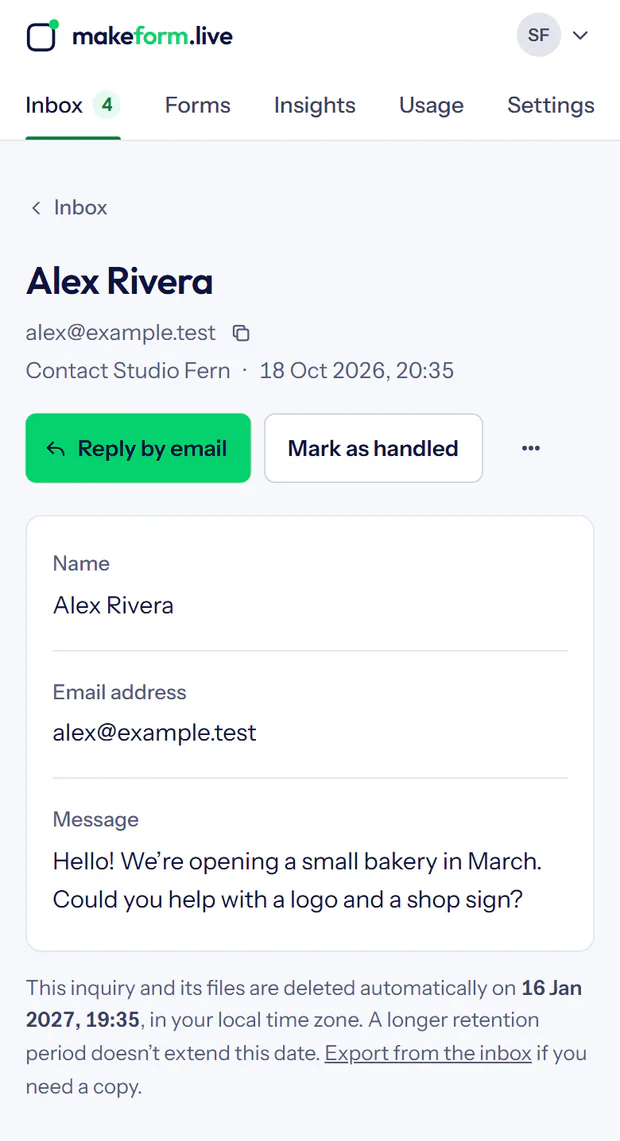
If the form emails you, the notification contains a private link to that inquiry, and its answers too if the form is set to include inquiry details. If the email is missing, check the inbox here first, then the recipient’s spam folder. See notification email help.
Handled and unread inquiries
Not handled means an inquiry still needs your attention. Choose Mark as handled in the inquiry or in its row’s More actions menu, or choose Reopen inquiry if it needs more work. Reading is separate: opening a message marks it read, and Unread only shows messages you have not read or have marked unread again. Changing either status does not send a reply or extend the deletion date.
Move an unwanted message to Spam
To move an unwanted message to Spam, choose Mark as spam in the inquiry or in its row’s More actions menu. Spam is deleted within 30 days of being marked unless you choose Not spam, which moves it back to your inbox.